Monday, February 28, 2022

My Banana Pudding

 I wasn't compensated for this post. All opinions are 100% my own,

My Banana Pudding


Who doesn't love Banana Pudding, I know we do. I make it whenever I can and my family really tears it up. It is pretty easy for how amazing it is.

Ingredients
  • 3/4 cup granulated sugar
  • 4 T cornstarch **Cornstarch is a thickener. If you’re finding your custard to be more runny than you would like add in 1/2 T at a time to thicken.
  • 1 egg
  • 2 egg yolks
  • 3 cups  milk 
  • 2 1/2 tsp vanilla extract
  • 1/2 tsp salt
  • 4 T butter (unsalted)
  • 5 medium bananas (ripe)
  • 1 box vanilla wafers
  • 1 container cool whip
First get a 13x9 and put wafers and cut up bananas in the dish and set aside.


 Combine the sugar, cornstarch, egg, egg yolks, whole milk, vanilla extract, and salt in a medium pan on med-low heat. Whisk  together in the pan for about 10-12 minutes, combining the ingredients.It may seem like it will never get thick but it does and as quick!
 Once you get a pudding consistency, remove the pan from the heat and add in the butter. Stir in until melted. 

Once the butter has melted pour the pudding evenly over the banana and wafers.

Then I put the dish in the fridge for about an hour. Then top with cool whip.
I like to put it in the fridge at this point and try to wait for the next day. I say try but we have been known to tear into it at this point.  Enjoy!


Here We Go Again Ready wasn't compensated for this post. All opinions are 100% my own.


Saturday, January 8, 2022

Crock Pot Refried Beans and Nachos

 I wasn’t compensated for this post. All opinions are 100% my own.


Crock Pot Refried Beans and Nachos


 My family loves Mexican inspired dishes. I started with home made pinto beans in my crock pot.

Crock Pot Refried Beans

1 bag pinto beans

1 small onion

1 jalapeno pepper minus seeds

4 cloves garlic

3 teaspoons salt

1 tablespoon hot sauce

pepper to taste

9 cups of water


So this recipe is so simple. Rinse your pinto beans and make sure you remove any dirt, rocks, etc. Place them in the crock pot with all the ingredients listed above. Cook on high 8 hours. You can stir every now if you would like. Take a potato masher and mash the beans. Or you can you a immersion blender. That is it! You will never buy store beans again!

So now that I have given you the refried beans recipe, I made some awesome nachos just for gameday. So get your favorite tortilla chips and layer them on a foil lined cookie sheet. Add about a cup or 2 of the refried beans. Top with about a cup of your favorite shredded cheese. I then top them with basic taco meat. From there you add more shredded cheese. I have to admit I’m really heavy with the cheese, way more than I’m going to admit. I would say a normal person would use about 2 cups. Put your nachos in a 450 degree oven for about 10-15 minutes or until the cheese is nice and bubbly.


Right out of the oven I add green onion. You can top with sour cream, guacamole, and so much more.


Here We Go Again Ready wasn’t compensated for this post. All opinions are 100% my own. I only recommend products I feel will be beneficial to my readers.

Sub Sandwich Bread Recipe

 I wasn’t compensated for this post.


Sub Sandwich Bread Recipe


My husband’s birthday is in a few days and he said he wanted meatball subs for dinner. I have never made sub bread before but I love to bake so I headed to my computer to see what I could find. I wanted to experiment today so I could find the perfect bread before his birthday. 

I quickly found Bless This Mess and she had the perfect recipe. I headed to the kitchen and went to work.  This bread is amazing! It is just what I was looking for. If you have a stand mixer like I do it is so quick and easy.

It is so soft and yet holds up well when used for a sub. I don’t have to go to the sub shop anymore now that I have this!

Head over and make this amazing bread yourself, you won’t be disappointed!!! Click the link below to get this recipe now!


Sub Sandwich Bread Recipe


Here We Go Again Ready wasn’t compensated for this post. All opinions are 100% my own. 

Homemade Nilla Wafer Cookie Recipe

 I wasn’t compensated for this post. All opinions are 100% my own. This is a variation of a family sugar cookie recipe my Grandma has made for years.


Homemade Nilla Wafer Cookie Recipe


When I go shopping I love to go early in the morning when they discount things that need to be sold quick. I am a sucker for the overripe bananas. I get a bag about once a week for banana bread or banana pudding.


When I went to make banana pudding I realized that I didn’t have any Nilla wafers for my pudding. I love making things from scratch if I can. I remembered that my grandma would make sugar cookies when I was young that reminded me of them so I called her to get the recipe.

I changed it up a little bit just to make sure they were as close to the right flavor as I could get and I can’t believe I got it right the first time! Here is the recipe:


Ingredients

  • 1 stick softened butter
  • 1 cup sugar
  • 2 1/2 Tablespoons vanilla extract
  • 2 cups flour
  • 1 teaspoon salt
  • 1 teaspoon baking powder


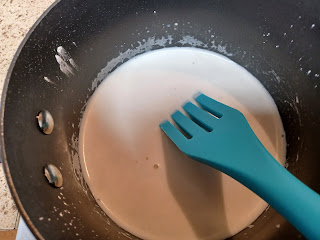
This cookie recipe is really easy and basic. I mixed the butter and sugar in my stand mixer until smooth. The only thing I really changed in my grandma’s recipe is the vanilla. I know it sounds like a lot but I’m telling you it is the perfect amount to get the right flavor.


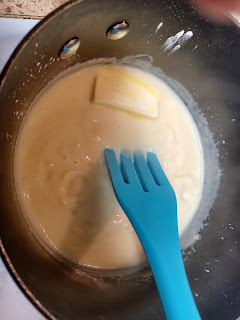
Add dry ingredients to the wet and blend until well mixed.  I then put the dough in the fridge overnight. You can do it for less time but you want it nice and cold.  When ready to bake preheat oven 350.  Line your cookie sheet with a silicone mat. If you don’t have one they are awesome! Roll small balls of dough and place on sheet. I like mine really small, like the mini size but you can make them closer to the original size. 

Flatten out the balls slightly before baking. Cook for 15 minutes or until golden brown.  If you want more of a sugar cookie consistency 10 minutes should be long enough. Transfer to a wire rack until cool.  

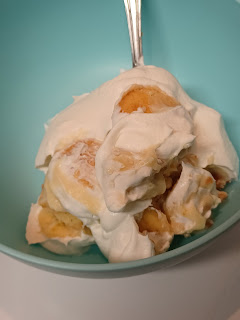
I personally waited a couple of days before I used in my banana pudding just to make sure they were hard enough.  I will never buy store bought again! They are so yummy!


Here We Go Again Ready wasn’t compensated for this post. All opinions are 100% my own. This recipe is based on an old family recipe handed down with a couple of variations.

My Sourdough Brownies

 I wasn’t compensated for this post.  All opinions are 100% my own.

My Sourdough Brownies


I always have sourdough starter on hand. I’m always trying different ways to use the discard starter. This is a twist on my normal brownies using sourdough starter in the mix!

Ingredients

  • 4 ounces unsweetened baking chocolate
  • 4 Tablespoons sugar
  • 1/2 cup hot water
  • 1 teaspoon baking soda
  • 1 cup butter, softened
  • 2 cups sugar
  • eggs
  • 2 teaspoons vanilla extract
  • 1 cup semi-sweet chocolate chips
  • 1 1/2 cups flour
  • 1/2 teaspoon salt
  • 1 1/2 cups sourdough starter

Place chocolate, 4 Tablespoons sugar, and hot water in pot. Bring  to a boil, stirring constantly to prevent burning. As soon as chocolate is melted, remove from heat and add baking soda. Stir well. Set aside to cool until lukewarm.

In a large bowl, cream butter and sugar. Add eggs and vanilla extract and mix thoroughly. Stir in cooled chocolate mixture, and chocolate chips. Sift flour and salt; gradually add to the chocolate mixture, stirring well. Stir in the sourdough mixing well. Pour batter into a greased and floured 13 x 9 pan. Place pan in a warm spot for 30 to 45 minutes to rise slightly. Bake at 350ยบ for 35 to 40 minutes. Cool and frost or shake powdered sugar on top if desired. I frost mine :). Enjoy!!


Here We Go Again Ready wasn’t compensated for this post. All opinions are 100% my own.

Rustic Sourdough Bread

 I wasn’t compensated for this post.  All opinions are 100% my own. This is not my recipe and can be found on King Arthur’s Flour site.

Rustic Sourdough Bread


I’m from the California Bay Area so I love sourdough bread. Extra sourdough bread to be exact. It is so hard to find anywhere else I have lived so I thought well if I can’t find it maybe I can make it? I have to warn on this recipe, it takes a long time. This is because you aren’t using yeast at all. You are only using the natural yeast of the sourdough starter. 

Okay so you say sourdough starter, what is that? Well it is a process that takes at least a week before it is ready to go. For a good sourdough starter recipe I started at King Arthur Flour’s site and followed the recipe here.

Once at least a week has past and your starter is looking good and ready it’s time to start on the bread.  Now like I stated this is a rustic sourdough bread. It doesn’t use added yeast. There are many recipes with yeast used along with the starter and I will post one at a later date. 

This recipe makes 2 loaves. Make sure you follow all of the steps and you will have an amazing bread.

My family gets so excited when they see that I’m in the process of making this bread. It is well worth the wait I can promise you that. 

Now for the recipe. I used the recipe at the same site I got the starter recipe from King Arthur’s Flour. They have so many amazing recipes. Make sure you look around while you are there.

GET RECIPE HERE

Here We Go Again Ready wasn’t compensated for this post. All opinions are 100% my own. This is not my recipe and can be found on King Arthur’s Flour site.

Onion Beef Noodle Casserole

 I wasn’t compensated for this post. All opinions are 100% my own.

Onion Beef Noodle Casserole

I love making casseroles. They are quick and easy and full of flavor. I am always trying to come up with new things with ground beef. This is my newest twist on a ground beef noodle casserole. I hope you love it as much as my family does!


Ingredients
  • 1 package egg noodles
  • 1 pound  ground beef
  • 2 cans  cream of mushroom soup
  • 16 oz container sour cream
  • one envelope onion soup mix
  • 1 container  French’s fried onions


Instructions
  • Preheat oven to 350 degrees F. Spray a 9×13-inch baking pan with non-stick spray.
  • Cook egg noodles and drain.
  • Break up  ground beef and cook in a large skillet, over medium-high heat, until no longer pink. Drain any grease.
  • Add soups, onion soup mix, and sour cream to beef in skillet. Stir together. Add cooked egg noodles to mixture.
  • Pour noodle mixture into the  prepared pan. Top with  fried onions.

Bake for 25 to 30 minutes. I like to serve with a garden salad and homemade bread. Enjoy!


Here We Go Again Ready wasn’t compensated for this post. All opinions are 100% my own.